
To delete a staging site just go to
WordPress Live Site > WP Staging > Sites / Start
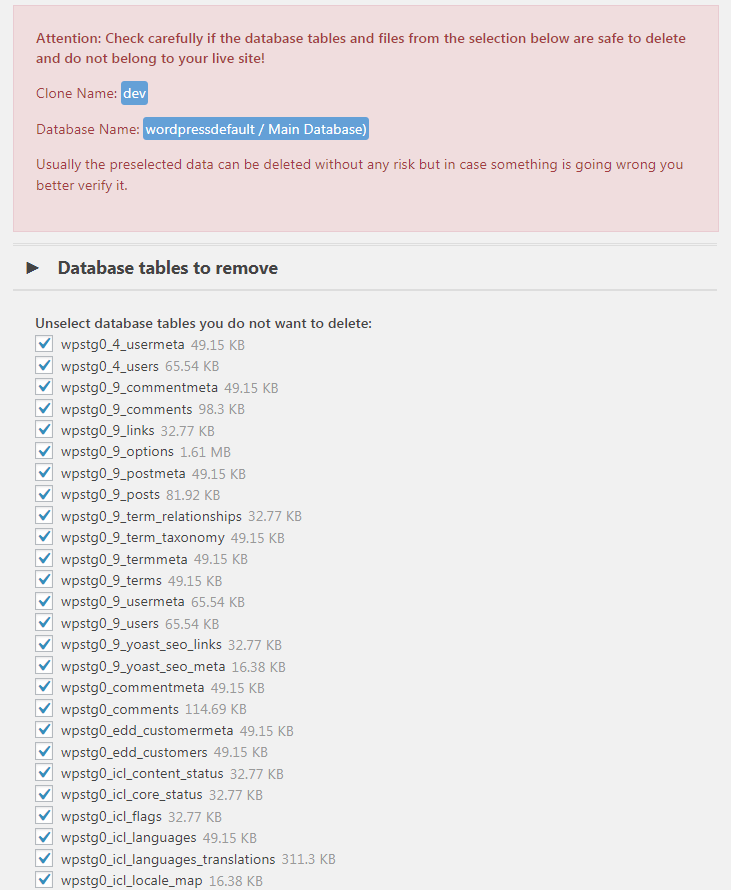
There you find a list of available staging sites and a delete button on every list element:
Clicking on the delete button will open a confirmation menu which allows you to double-check the database tables before deleting:
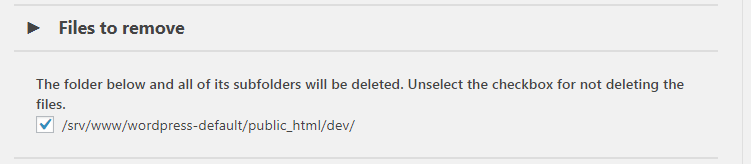
It will also show you the exact directory which is going to be deleted:
Click on the button “Remove” and WP Staging will delete the entire staging website without touching your production website.

If you do not tell WP STAGING to use a separate database for the cloning process, all database tables will be copied to the main database, prefixed by a string like wpstg[id]_. That prefix separates the tables belonging to the production site from the ones belonging to the staging site.
That prefix makes sure that the staging website is completely independent of the production website. So the WordPress default database object wpdb has no access to the staging website, and the staging website has no access to the production site.
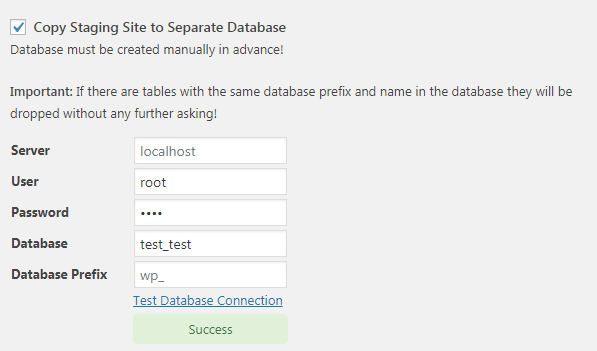
If you still want a little more safety and separation between both sites, you can copy the database tables to another database.
To do so, activate the checkbox Copy Staging Site to Separate Database and enter the input fields’ database credentials. Make sure that you have created that other database in advance. WP Staging cannot do that for you due to database permission restrictions.
You can usually create a new database from your hosting dashboard (Cpanel) from the database section.
When you are done, test the connection by using the Test Database Connection link:
Start Cloning Process
Click on START CLONING and watch WP Staging creating the clone of your WordPress website automatically:
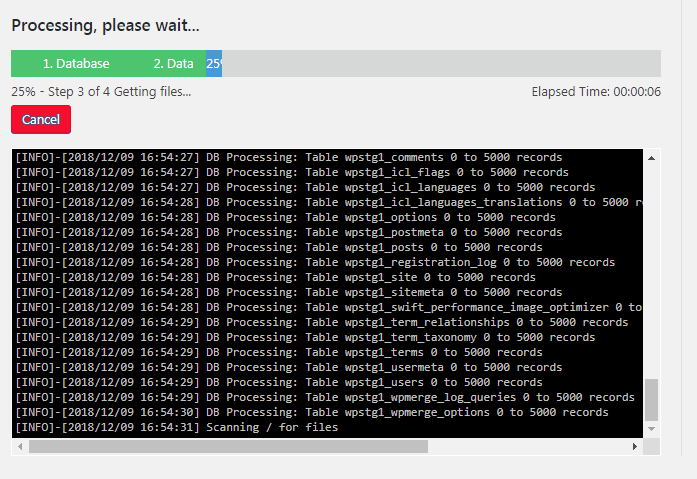
Depending on the size of your website, this can take a few minutes or a little longer. When you did that, you’ll get the screen as below:
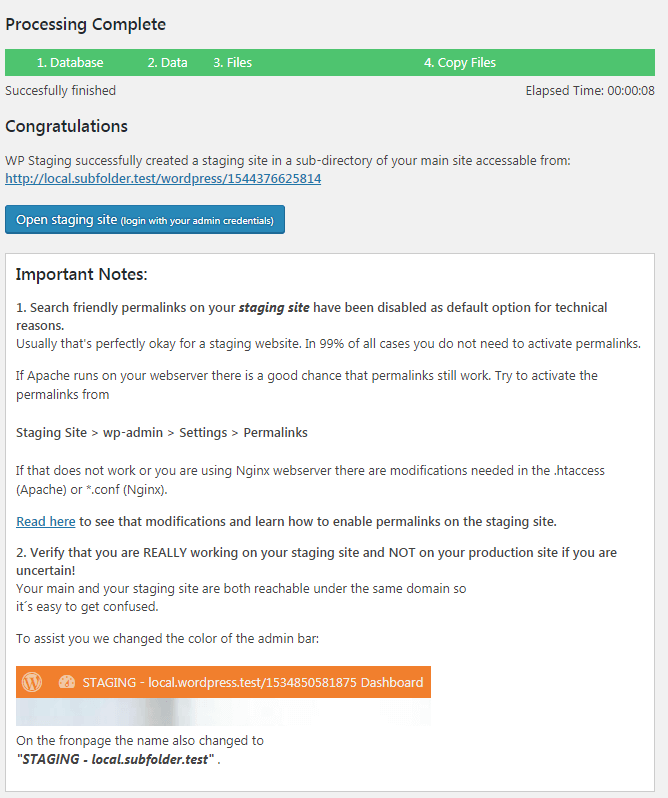
From that page, you can directly open the staging site by clicking on the Open button, and you will also get an explanation which tells you that permalinks on the staging site are disabled due to technical reasons.
Tip: If you use the Apache web server, try to activate the permalinks again on the staging site. That should be working well.
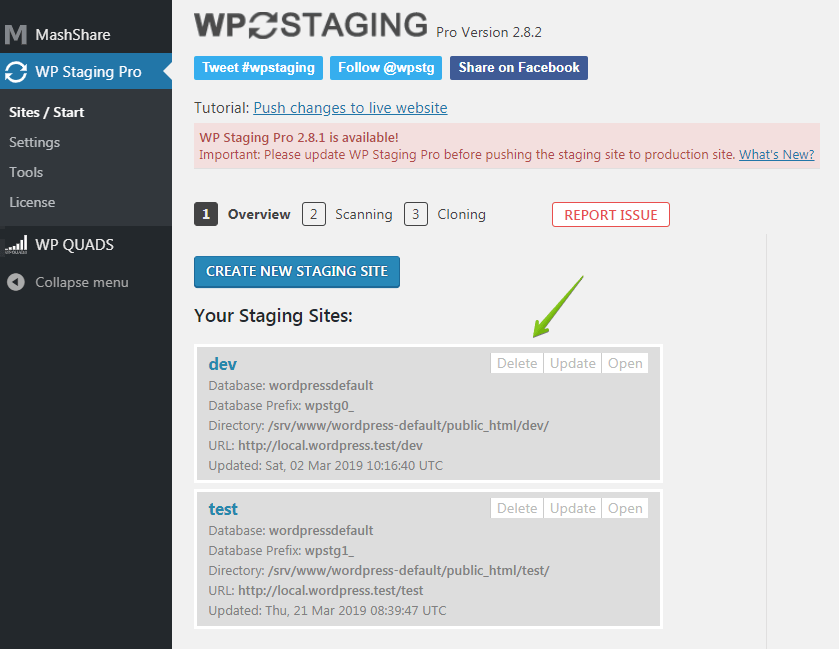
If you like to open your staging site the next time, go to
WP-Staging > Sites.
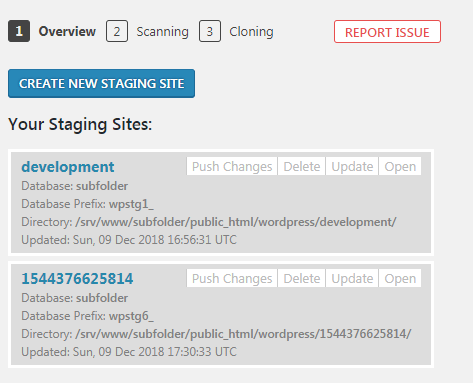
You’ll get there all previously created staging sites.
Btw. You can create as many sites as your webspace allows.